Thursday, September 15, 2011

Nerdvana


Lego Chocolate synergy.  So, so much greater than the sum of its parts.
 
Four is turning five, and has asked for a Lego themed birthday party.  And looking around for Lego-themed stuff, I discovered the most wonderful piece of kitchen gadgetry:  silicone Lego minifigure ice cube trays.

Except, who would limit themselves to freezing water, when you can mold so many other things, like chocolate and crayon wax, for starters?  Here are the details.


Chocolate on chocolate on chocolate.  With Lego thrown in.  Can't go wrong with that.
For chocolate Lego minifigures, melt semi-sweet chocolate in the microwave (for 1 oz, on high for 1 minute, stir, then another 10-30 seconds more until smooth and liquid when stirred).  Each minifigure takes about 7 grams of chocolate, so figure on 2 oz to fill the 8-minifigure tray.  Drop the chocolate into the molds with a teaspoon, mounding slightly, then repeatedly tap the side of the mold quickly with your finger to let the chocolate settle and allow air bubbles to escape (it's a neat model of liquefaction).  Let it set in the refrigerator for 15-20 minutes, then pop them out by easing the sides apart and pressing them out from their body and toes (try to press the whole minifigure out evenly, because if you bend them too much you may lose a few toes).  It's incredibly easy, and the silicone releases so well there's pretty much no clean-up.


Whipped ganache frosting tops these cupcakes.


The frosting recipe is too good not to share, too:  1 cup heavy cream, heated to boiling.  Remove from heat, and stir in 4 oz chopped semi-sweet chocolate.  Stir until smooth, then chill.  When cold, whip at medium speed until thick (like whipped cream).  Pipe with a 1M tip in a rosette, starting at the center.  And the cake?  Boxed mix.  What, you think I'm that crazy?


When you run through your chocolate supply, look around the house for other things you can melt, like the bin of old crayons.

**(Updated:  see below)  Peel the crayons, break them into smaller chunks, and heat them in an old bowl in a pot of water until melted, then spoon into the molds.  It takes 5 grams of crayon wax to make a minifigure; if you only want to make one of each color, it's easier in terms of clean-up to take an old soup spoon and melt the crayon in that, held over a candle.  Cold crayon wax is a bear to get off of pots and bowls; if anyone has a (relatively non-toxic) solution beyond hot water and a scouring pad, let me know.  Let the wax cool, then pop out your minifigures like you did the chocolate.  It's addicting, I tell you.  If you stick a length of cotton twine in the minifigure before the wax cools, I bet you could even use them as candles.


So I was looking around at other Lego party ideas, after the fact of course (since when would I have had time before the party?) and came across the blog of a much cleverer and put-together woman who used the microwave to melt the crayons in the mold.  No clean-up, so much easier, just ignore my instructions here and check out hers.  Well, now I know silicone is microwave safe.


Posted by Picasa

Tuesday, August 23, 2011

Back to School Banner

The kids heading back to school is a cause for celebration in our household.  They love school almost as much as they love being home, and I love them more when I don't see them 24-7.  Call it cold-hearted, but it's the truth.  And here in Florida, being in an air-conditioned schoolroom is as good a way as any of spending the hellish summer months, so I'm glad they head back mid-August.  If the state had any sense, we'd have them in school through the summer and let them out for vacation in February.

Last year, I bought a celebratory flag for the event:


And this year I thought I'd make a banner for the front room.  A few years ago a sister-in-law introduced me to the gem of an idea of decorating with banners - a lot of sparkle for an itty bitty storage space.  And with just felt, black fabric, heat-n-bond, and a measuring tape holding it all together, it's an inexpensive and easy little way to celebrate the newfound peace and quiet at home.  And the excitement of welcoming them home, of course, with celebratory cupcakes around the kitchen table as they recount the day's adventures.

 You'll need:
 6 sheets of 9"x12" tan felt, cut into twelve 6"x7" rectangles
black felt or fabric
white felt for letters
paper-backed fusible web (heat-n-bond, Wonder under, are a couple of brands)
scrap felt in  assorted colors
10' measuring tape

Iron enough of the fusible web onto the black fabric to back twelve 5"x6" rectangles (it's easier to just iron on a large sheet and then cut the rectangles out of that).  Peel off the paper backing, center rectangles on the tan felt ("frame" of the blackboard), and fuse with iron.


For the letters, print out the desired font (I used a Zaner-Bloser font which I'd be happy to send you in a pdf, just e-mail), then trace onto your fusible web against a light box or window.  Be sure to reverse your letters when tracing them, since they will be flipped when you fuse them on to the banner.  Trust me in this.  I have mindlessly made this mistake many, many times.

See?  The "B" is backwards.  FLIP THE PAPER OVER BEFORE TRACING IT.  Or flip the font before you print it.  Either way, make sure it's backwards.


Fuse the web onto white felt, then cut out the letters.  Peel paper backing and fuse onto the blackboards.

Decorate the chalkboards with colored felt cut in the shapes of apples, crayons, books, whatever.  Then cut a 1/2" slit in the felt on each side of the chalkboard, thread through your measuring tape, and you have a back to school banner all ready to hang.


Monday, August 22, 2011

Socks for Supper


One of my favorite childrens' books is Socks for Supper by Jack Kent.  In it a poor old couple who subsist entirely on turnips from their garden have the idea of knitting socks to trade for cheese with neighbors who own a cow.  When she runs out of yarn, the old woman starts unravelling her husband's one sweater to make more socks.  Meanwhile, the dairy farmer's wife is busily unravelling the socks to put toward a sweater that she is knitting for her husband's Christmas gift.  Christmas morning, he tries it on to find that it is too big.  But they noticed that the old man seems to need a sweater, so they give it to him for a gift - and it fits perfectly.  The book has it all - yarn, cheese, and a heart-warming lesson in economics. 

It came to mind recently when baby girl asked for a pony, and in digging through my stashes of pink cotton yarn, I came across an old baby shrug that she had outgrown.  I've unravelled things aplenty, but only to correct mistakes; this is the first time I've actually recycled yarn.  There's something almost magical in it - that a long, long piece of string can be turned into a sweater, worn until it is outgrown, then undone and reworked into a pony.  Though I do hope she doesn't barter it for cheese.


The cutest pony pattern in existence:  "Clop & Ali" by Fran Goreham, Crochet World,  June 2004.
 
Meanwhile, the pony is hidden away to await Baby Girl's birthday.   

Don't you just love her brown-leather eyes.

Posted by Picasa

Friday, July 29, 2011

Peekaboo Petticoat

Before

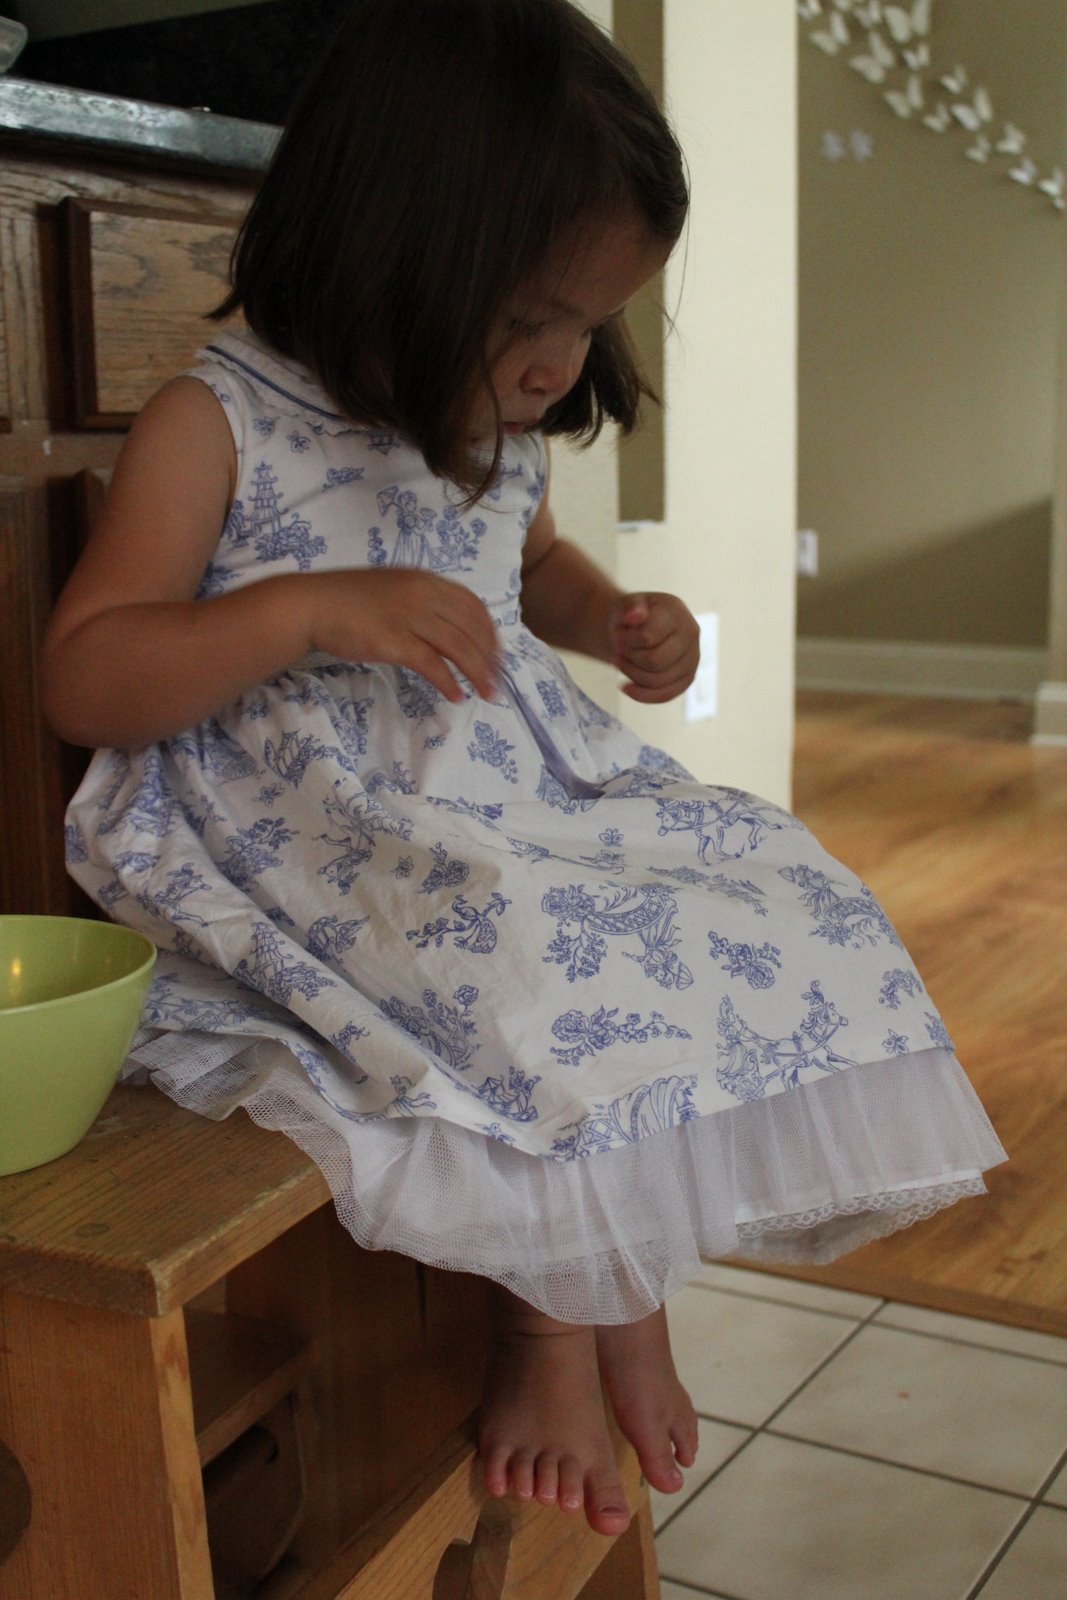
Baby Girl has been sprouting up this summer, and all of a sudden looking like a little stork in her too-short dresses.  But, you say, since you are so good at passing along out-grown clothing, why not give away this lovely $2.50 used-clothing-store-find and let the girl have a new dress?  Ah, but you haven't looked closely.  There are horses on this print, and if you think Baby Girl is going to let a bit of exposed undies keep her from wearing this dress to rags, you have another think coming.

After (+ 3 inches)

Normally my way of dealing with highwaters and too-shorts is to add a ruffle; this dress, however came with a ready-made underskirt, crinolined, lace-trimmed, and entirely obscured by the overskirt.  So it was easy to just extend this underskirt to give her a few more inches of length.  Maybe showing a petticoat isn't entirely de rigueur, but in this day of baby thongs, it's the least of my worries.

Why they bothered to put lace on a skirt that is hidden, I'm not entirely sure.

Want to extend the life of some of your little gal's fancy dresses?  Here's how:
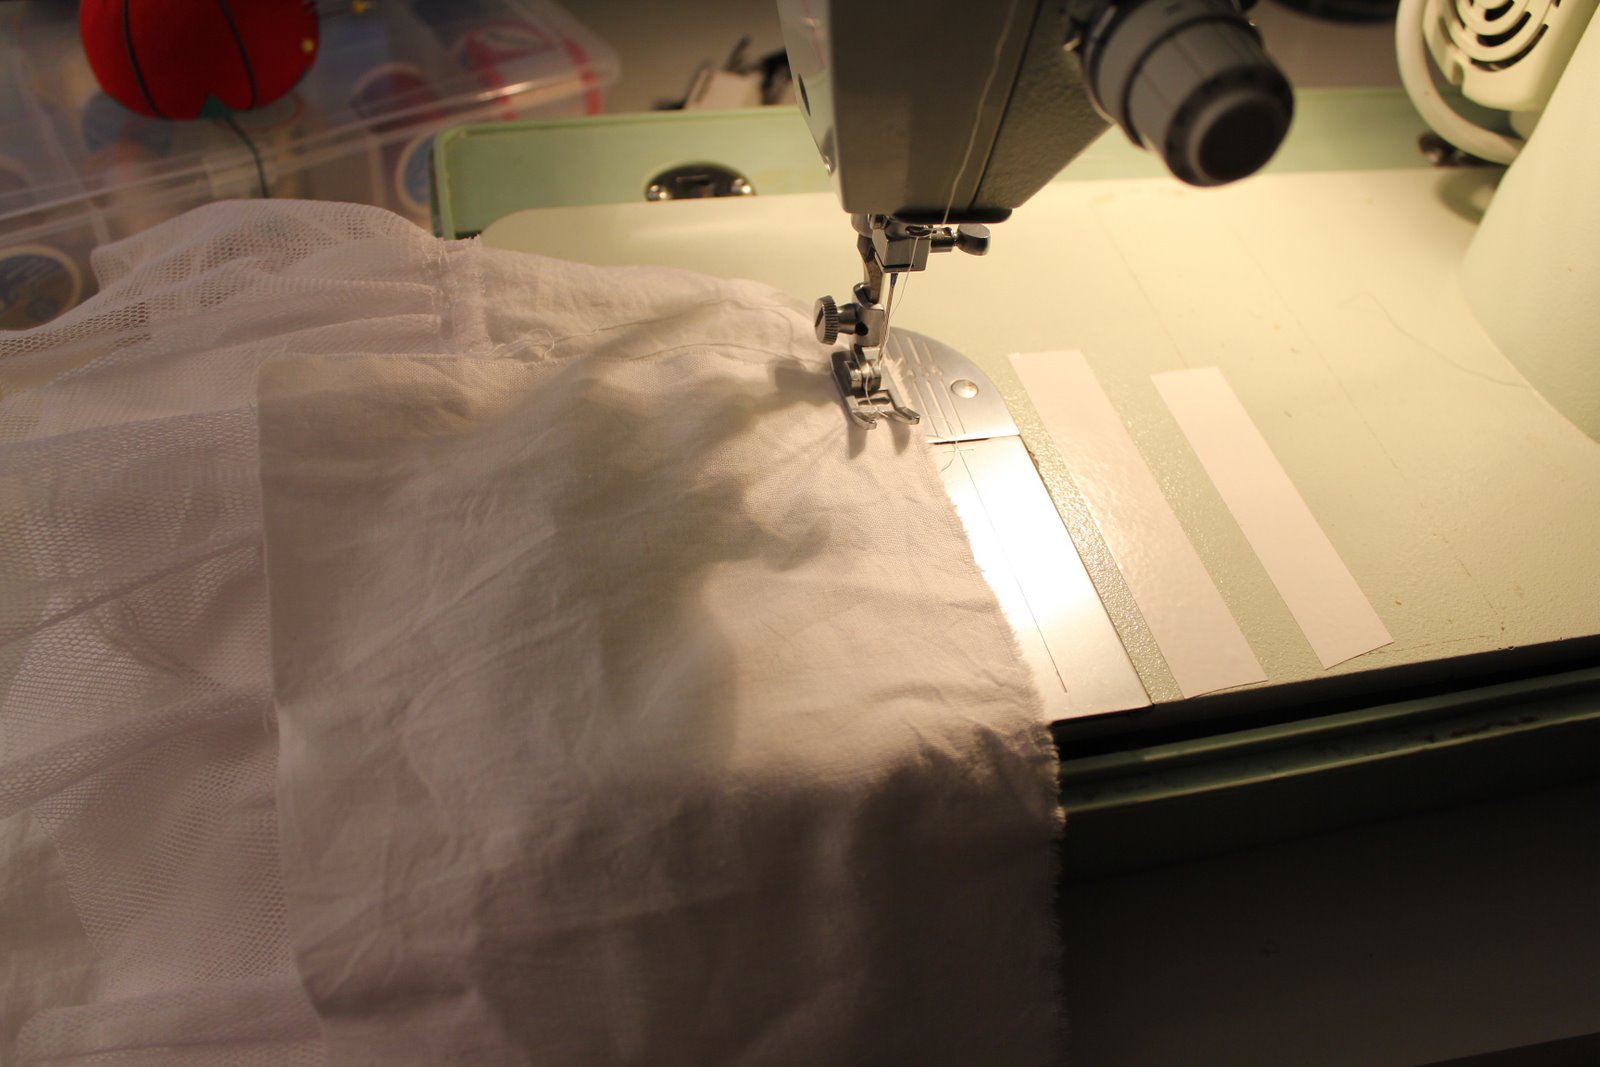
I cut off the underskirt (make sure to use a ruler as a guide, or measure and mark the skirt so you don't end up with an uneven edge hanging out after you're done).   Then I dug into my scrap bin for some white muslin, long enough to encircle the entire underskirt and wide enough to add the desired length, plus another inch for seam allowance.  Of course I didn't have a piece that was actually long enough, and had to piece it together from 4 separate scraps, but that is beside the point.

Cutting off the edge of the underskirt:  cut it wide enough for the desired part to show plus a few inches, so that the seam will remain hidden under the overskirt when it is finished

Sew the bottom (lace-edged) half of the underskirt to the length of fabric (the "extension", so to speak) with a straight seam, outside (right side) surfaces together.  When you come to the end of the circle of underskirt, cut off any extra length on the extension, leaving a 1/2" seam allowance on both ends.  Then open up the 2 pieces you've just sewn together, and with the inside (wrong side) facing you, zigzag over the edge of the seam allowance to prevent fraying.  (You can iron it to one side first, or just finger-press it down as you sew).  Sew a seam up the ends of your extension, to form a tube. 
Repeat on the other edge of your extension, sewing it onto the top half of the underskirt that is still attached to the dress.
Sewing extension to bottom edge with straight stitch.


Zigzag over the seam allowance.


Not the prettiest seam, but fast, sturdy, and no-one's going to see it anyway.


And there we go.  Another few months of wear... maybe long enough to get us past this current horse obsession.
Posted by Picasa

Something from Nothing


The almost-finished police van, here still missing taillights, blinkers, and a front grill.
 

I am not much of a hoarder; in this land of houses without basements and candle-melting attics, you don't have much storage space unless you're willing to devote an entire room to your stuff.  And with 4 kids in a 4-bedroom and 6 bikes taking up all the space in the garage, we don't have any room to spare.  So I've gotten good about donating outgrown toys (except Legos, we NEVER part with Legos), passing along outgrown clothing, even tossing most of the endless artwork that comes home from school (after taking a digital photo of it, of course).

But I will admit to a weakness in the fabric department. I have a hard time throwing anything greater than 2" in any dimension.  Which is downright pathological, when you really think about it.  I have 2 large bins of scrap fabrics left over from prior projects, some of it over 10 years old, and I am certainly not using it up as quickly as I'm adding to the stash.  After baby girl's pink pony quilt (all new fabric, of course - what prior project would have used pinks and florals?) I was left with another small pile of leftovers that I just couldn't part with yet.  I'm not sure if it's having grown up in a waste-not-want-not home, or if it's just my own crazy.  Probably the latter; my mother doesn't sew.  But I can't resist the feeling of making something from nothing, like this pillow sham to match the pony quilt:


If you look closely, you'll see just how small some of the scraps were... On the upside, the pink pony scrap pile did shrink considerably


And when I finally got around to making Little Brother the police car he's been begging for (his brothers got Pokemon, he figured he deserved a plush toy of his own), it was great to be able to dip into the bin and get out the old t-shirts, and the scraps of silver lame, heat-n-bond, and felt, and, after a few days of drawing, measuring, cutting, and stitching, have made his little heart glad.  All without buying anything new or, worse, bringing 4 kids shopping at Joann's. 
Starting out with 3 t-shirts, a photo for inspiration, and a paper template.

Heat-n-bond, the secret to easy applique.  All the windows and doors were appliqued.


Snuggling with his police van before it's finished.  I had to sneak it away at night to sew on bumpers and paint on words and lights.

So easy to justify this particular bit of crazy.


Posted by Picasa

Wednesday, July 20, 2011

Tying up loose ends

For anyone who cares, these are Squirtle, Pikachu, Oddish, and Jigglypuff.  I think.

A few years ago, the big boys discovered Pokemon.  For the uninitiated... don't worry about it.  I don't understand it either.  But somehow these "pocket monster" creations have the ability to transform otherwise tough, rough-and-tumble boys into card-collecting-video-gaming-plush-toy-cuddling addicts.  It didn't bother me; as I saw it, in the grand Venn diagram of familial interests, we finally had an intersection:

Alright, I exaggerate... my boys (and I) are much more well rounded than that, and share many common interests.  But this was certainly the first time they were at all interested in the yarn arts, aside from one incident when The Eldest was 3, when he was playing with a friend and pretended to nurse his stuffed kangaroo while knitting with some tree branches.  Hmm, definitely some mimicry at work there, but I digress.  Anyway, I taught myself to crochet off of some helpful online diagrams (not difficult since I'd been knitting for years), and got to work on some Pokemon patterns by a talented and generous lady named WolfDreamer.  No, I wasn't exactly hurting for things to fill my spare time, but there are only so many things I can do in front of a movie or on a car ride, and knitting used to be one of them.  Moving to Florida effectively quashed any incentive to make sweaters... making crocheted plush toys (amigurumi) was a decent substitute.  And they were so well received!  The boys loved them!  They played with them!  They pored over WolfDreamer's website and begged for more!  Their friends were envious! Never had my crafting received such recognition.  It was addicting.

Until I burned out.  After 4 Pokemon in the first couple of months, and dolls for the 5 girl cousins and one for Baby Girl, I managed one last Pokemon for a birthday present for The Ninja before production ground to a halt.  It didn't help that the next one up was a huge one (The Eldest had his heart set on it) with 36 pieces that had to be crocheted and assembled.  And so it sat in a tote for the last year or so, sending guilt vibes everytime I glanced in its direction and started another non-essential project. 

But The Eldest is growing up, and his days of being interested in Pokemon are numbered.  And while unraveling a sweater that a child outgrew before I finished it is discouraging, he never really missed the sweater.  Never finishing Charizard, though, would feel like a failure.  And a rather inexcusable one when Baby Girl's quilt got put together so quickly.  So a couple of weeks ago I finally pulled it out again, and finished it, and here he is in all his glory:

This is a dragon, Charizard, courtesy of another talented lady, Biz, at http://www.bizzycrochet.blogspot.com/.
The Eldest loves it and is not too old to sleep with it at night.  Phew.  I am making no more promises about any future Pokemon (though The Ninja is dropping some serious hints about how much he'd like a badger.  Just a small one.  He found me a pattern.  It'd be pretty quick.  Maybe for Christmas).

And guess who is now asking for a pony.  And taking a ball of pink yarn to bed with her at night.

__________________________________________________________________________________

On the exercise front, I'm still running.  And getting marginally better at it - I can run for more than 5 minutes at a stretch now! - but still hating it.  I will admit to feeling good after a run, though whether that is purely relief from being done with running is anyone's guess. 

I'd been running at night after the sun went down, but that was keeping me up until 2 am.  And while I am a night owl and love late nights, it makes for grumpy days when the kids invariably rise with the sun.  So yesterday morning, I headed out at 7 am (and of course Baby Girl had her opinion of that, too - "But mommy, it's not night time!")

And tomorrow, I'm aiming for before 6, because if I have to be out running, it might as well be during Atlantis' last return trip, so that I can catch the sonic booms.

Posted by Picasa

Thursday, July 7, 2011

Cream Coloured Ponies

Can you spot the dun?  How about the palomino?

The last 4 mornings baby girl has been waking me up by clambering into bed, demanding, "Did you finish my pony quilt?"  Which partly explains why this particular project has progressed so quickly from conception (5 days ago) to its current state.  That, and her dragging me from other tasks to sit in front of the sewing machine, and perching on the sewing machine cover beside me, saying "I will stand over here and watch you."

We have been reconfiguring rooms, spreading 4 kids into 3 bedrooms and doing away with the toy room, and in the process baby girl has gotten her own room.  The sad loss of her roommate has been somewhat assuaged with the promise of a big girl bed with ponies (her current infatuation), and at the thought of a dedicated girl room, mom started having visions of pink and pale green.  A big girl bed needs twin sized bedding... I googled "pony quilt" (ok, I admit, then I added "pattern" to that search), and the rest, as they say, is history.


A project like this is really no more practical than, say, the man-of-the-house's current video game addiction.  (But because you get a tangible finished product that keeps your child warm, for crying out loud, so much more justifiable!  Never mind that we live in Florida and have no need for extra warmth.)  If I were practical, I'd have had a good look at all of the pre-made-in-China options out there, picked my favorite, and be done with it.  I can pretend it is somehow more economical, but by the time I have figured the cost of materials plus all the hours put in, even at minimum wage, I have just spent more than the price of anything Pottery Barn has to offer.

But.  There is value in the creative process for me.  (Admittedly, this was based on a pattern, so I don't get full points for creativity.  But look at the original pattern and tell me I don't get some credit for seeing the diamond in the rough.  After I got over being blinded by those colours, that is.)  Empowerment from being able to do things with my own two hands, which I hope gives my children that confidence, too.  And then the process, watched over by lots of little hands and eyes, which makes for memories that we would miss if this were store-bought.

Baby girl playing with her ponies
Mostly, though, I think the projects are about marking time.  Women for generations have been making crafts for their home, for function, yes, and for beauty, too.  But even when we don't aspire to any grand artistic endeavors, these creations are little milestones, visual reminders of achievement, of projects begun and completed, in an otherwise Sisyphean existence of meals and dishes and sweeping and laundry and the million other household tasks done each day, only to be undone with another turn around the clock. 

Of course that still doesn't explain the number of projects in my queue, nor the fact that I can finish a quilt top in 5 days but the master bed still has no bedskirt.  I'll have to find another rationalization for that.  (But who wants to make a plain white bedskirt when you can work with pink and green and ponies?)


The quilt top so far.
So here we are, at a resting point of sorts.  It still needs a pale pink border to bring it up to twin size, then there's the actual quilting and binding, terribly tedious tasks that I dread.  But to baby girl, this is a quilt, so for now she is satisfied.  Which means... it's time to add another project to the queue?